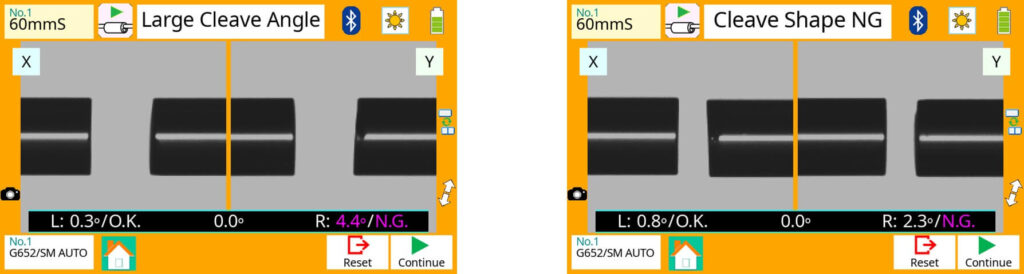
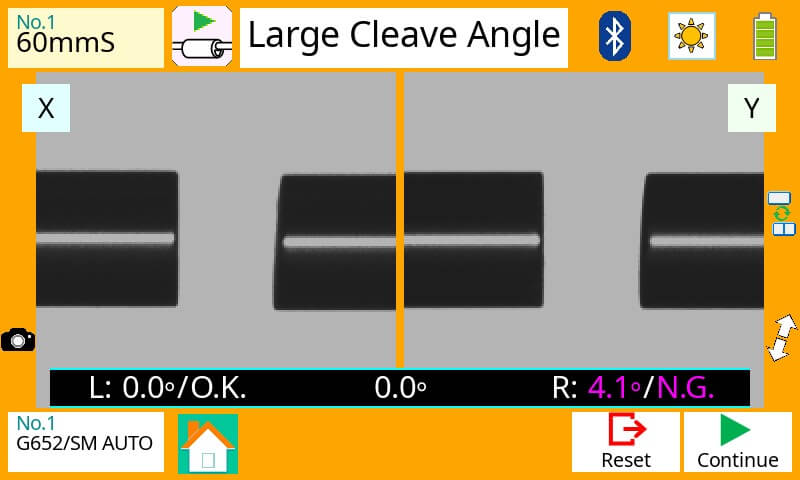
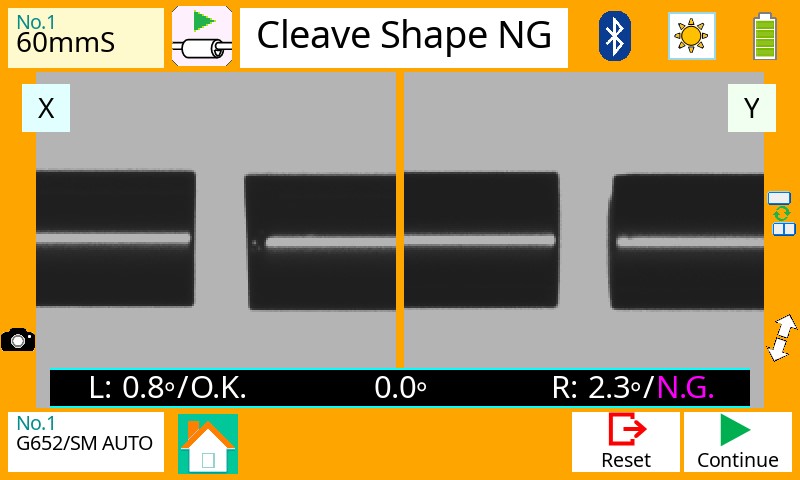
When : After using all position of the cleaver blade Errors that occur frequently ・Large Cleave Angle error ・Cleave Shape NG error
When : After using all position of the cleaver blade Errors that occur frequently ・Large Cleave Angle error ・Cleave Shape NG error
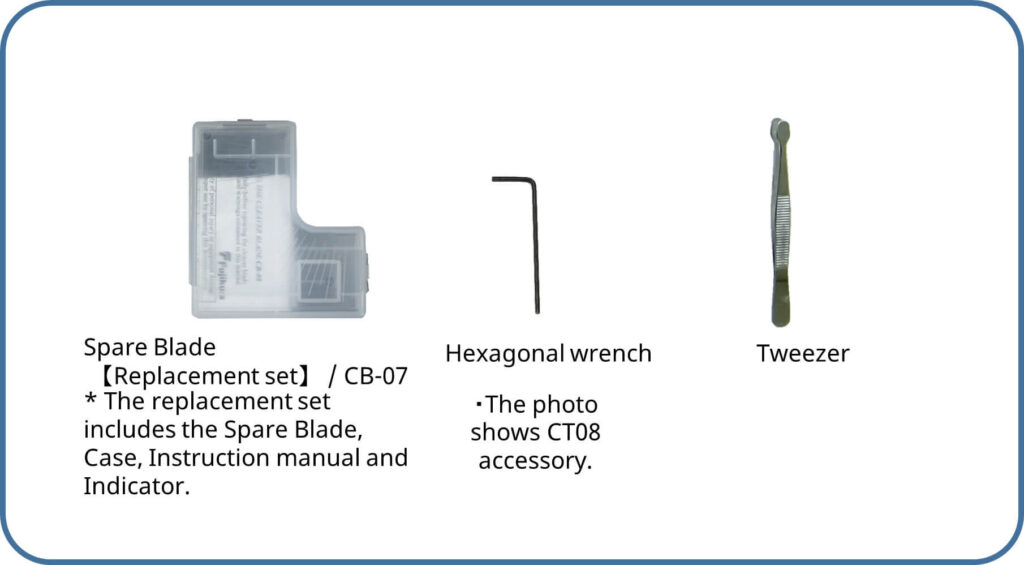
Necessary items to replace the Cleaver Blade for CT50
How to replace Cleaver Blade
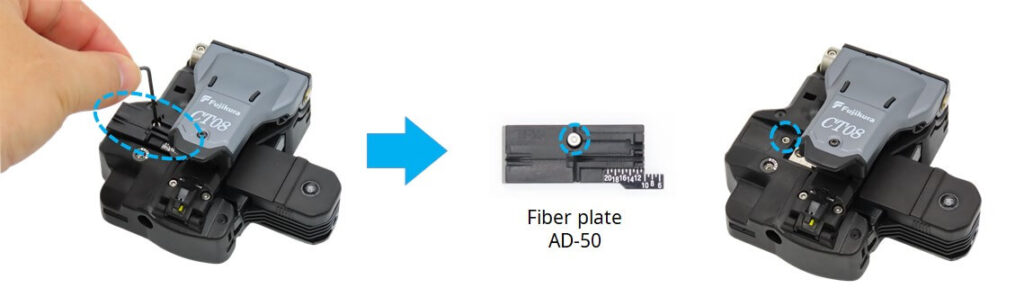
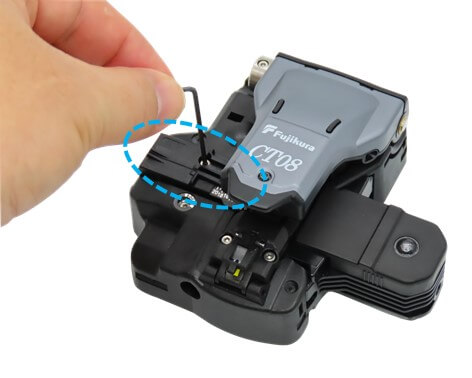
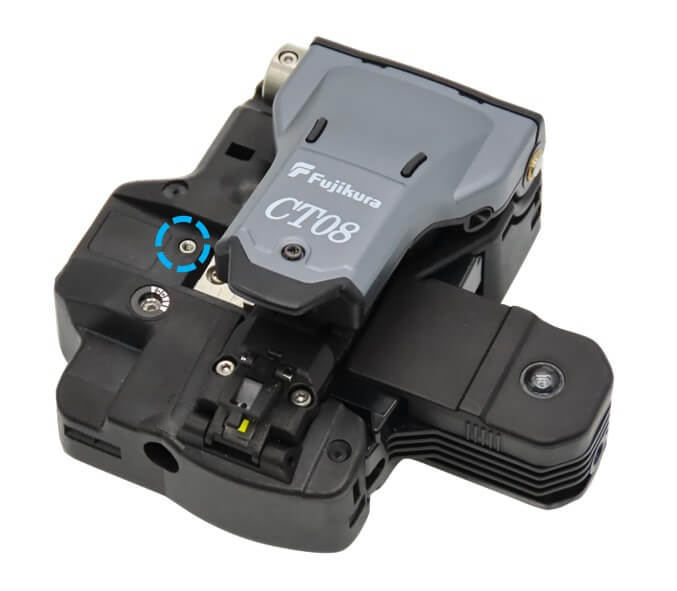
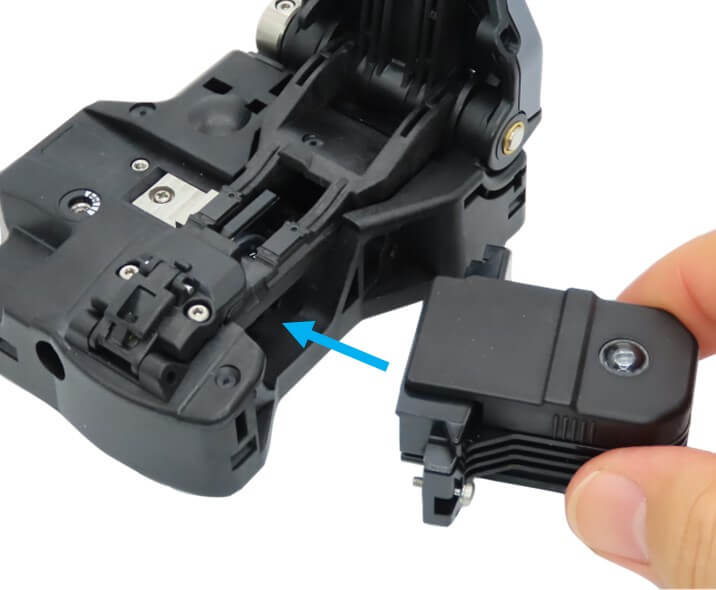
1. If the fiber plate (AD-50, etc) is attached, detach it. *When changing the cutting blade, the lower clamp arm gets stuck when raising it.
1. If the fiber plate (AD-50, etc) is attached, detach it. *When changing the cutting blade, the lower clamp arm gets stuck when raising it.
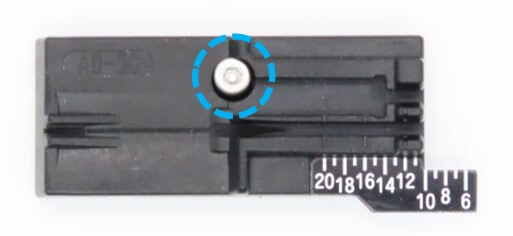
Fiber plate AD-50
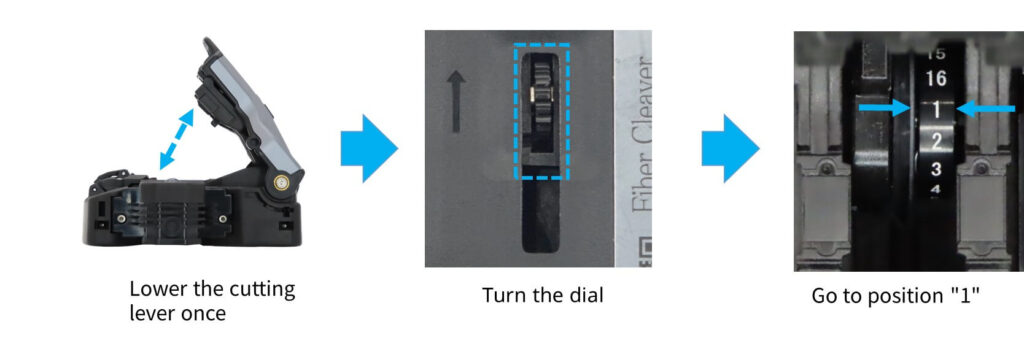
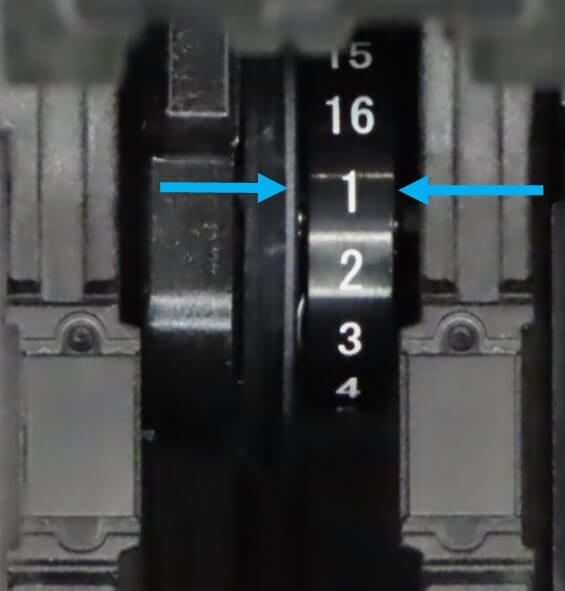
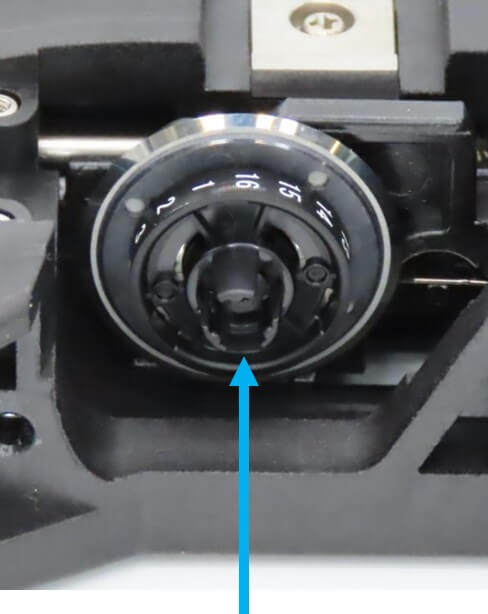
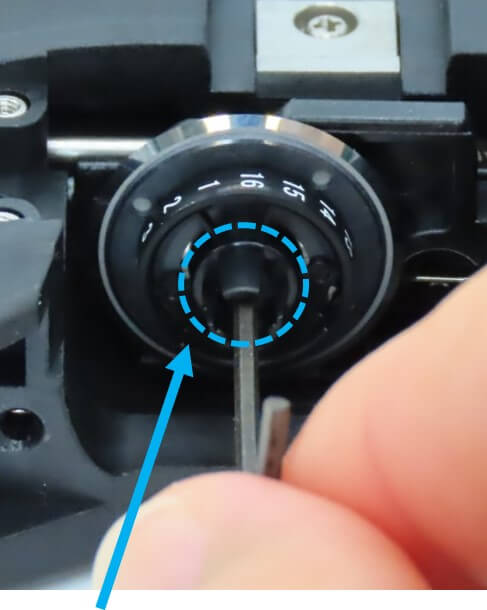
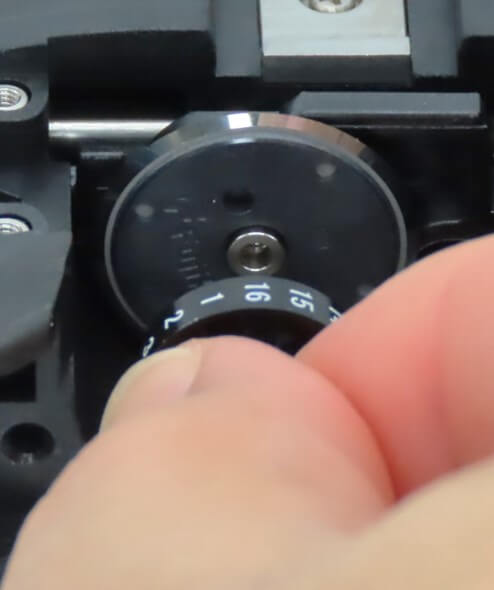
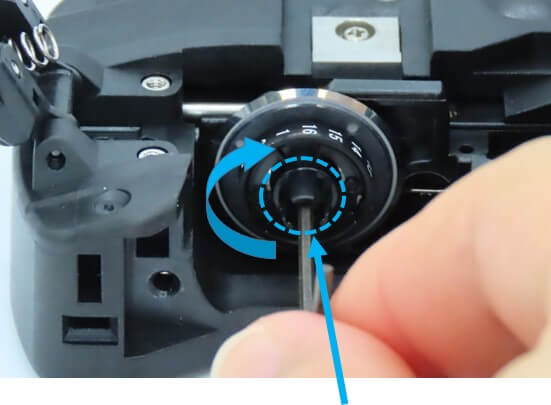
2. Make sure that the initial position of the blade position (the number directly above) is “1”.
・When the blade position is other than “1” Use the Rotate button or the blade rotation dial on the back of the main unit to set the blade position to “1”.
2. Make sure that the initial position of the blade position (the number directly above) is “1”.
・When the blade position is other than “1” Use the Rotate button or the blade rotation dial on the back of the main unit to set the blade position to “1”.
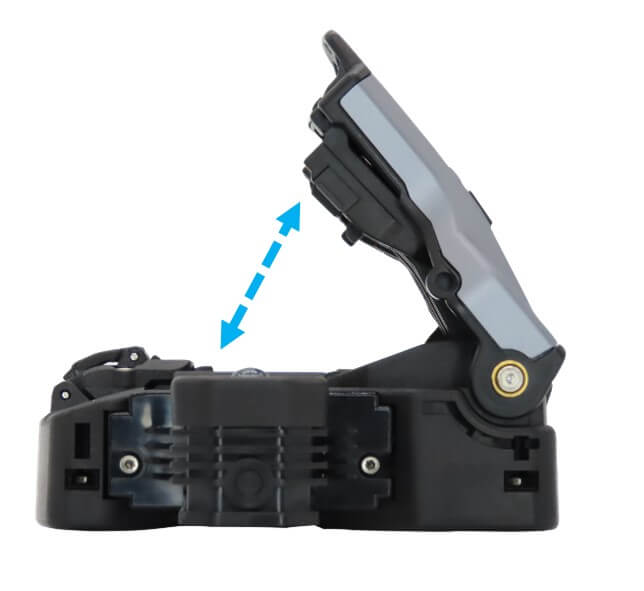
①Lower the cutting lever once
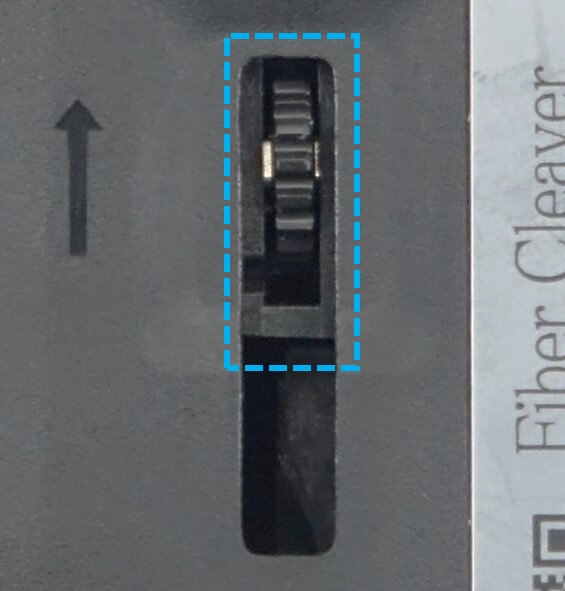
②Turn the dial
③Go to position “1”
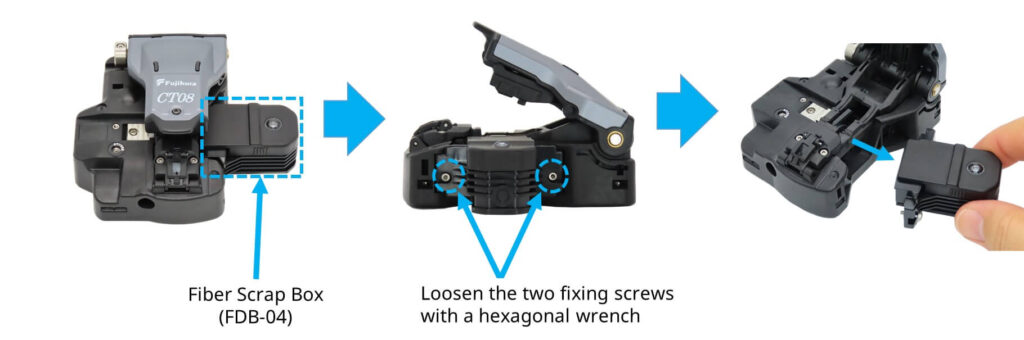
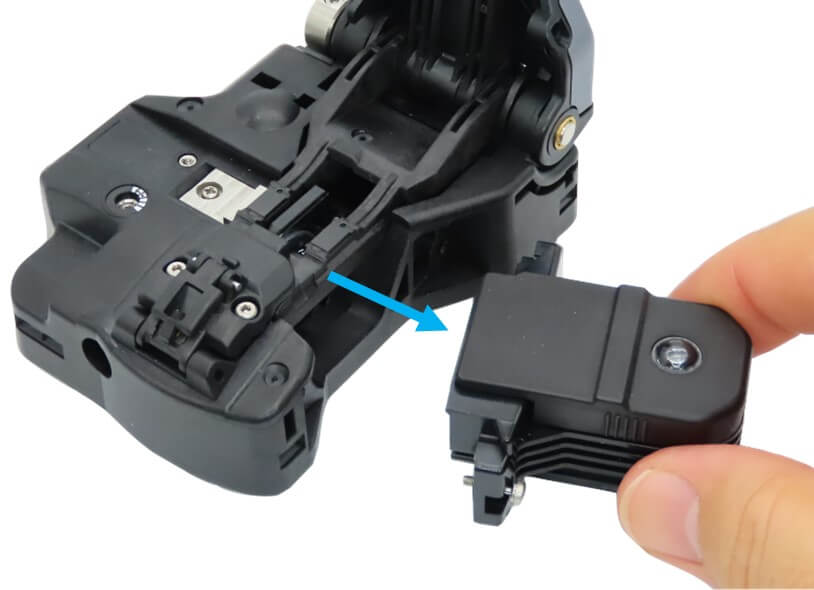
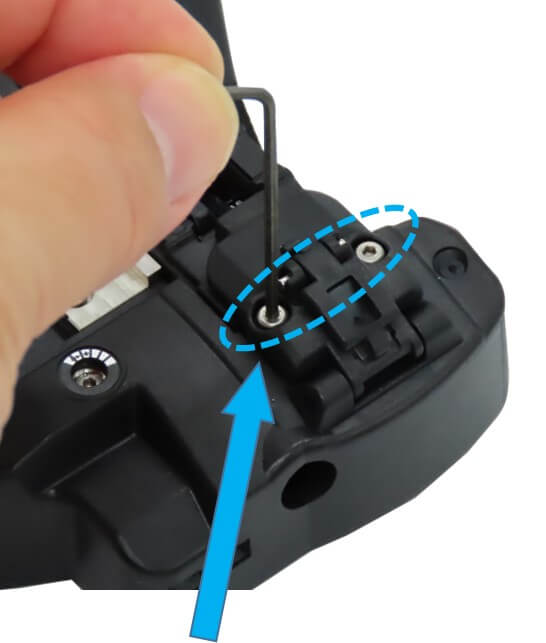
3. Remove the Fiber Scrap Box (FDB-04)
3. Remove the Fiber Scrap Box (FDB-04)
Fiber Scrap Box FDB-04
Loosen the two fixing screws with a hexagonal wrench
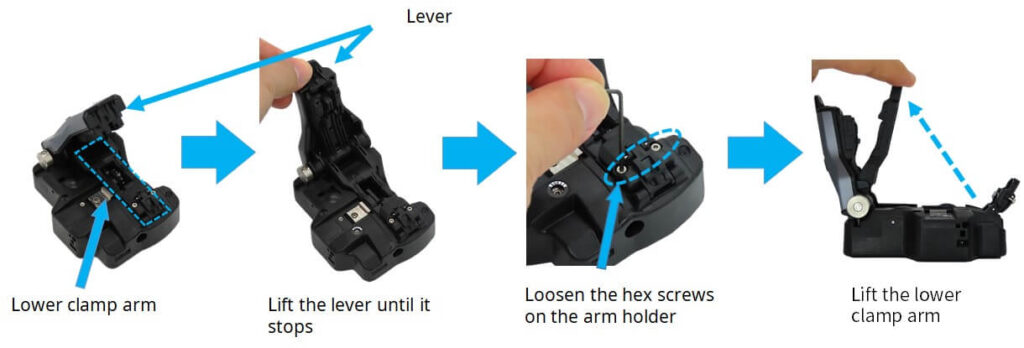
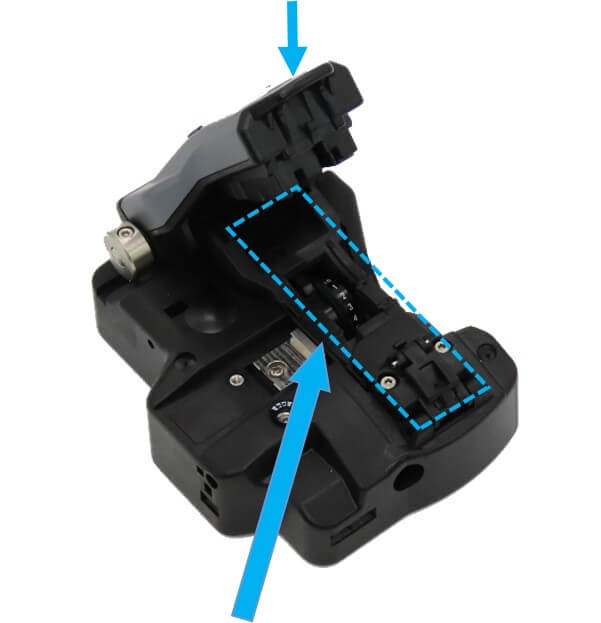
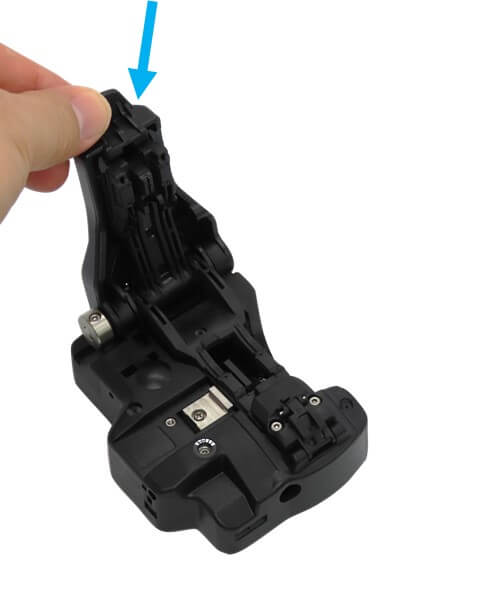
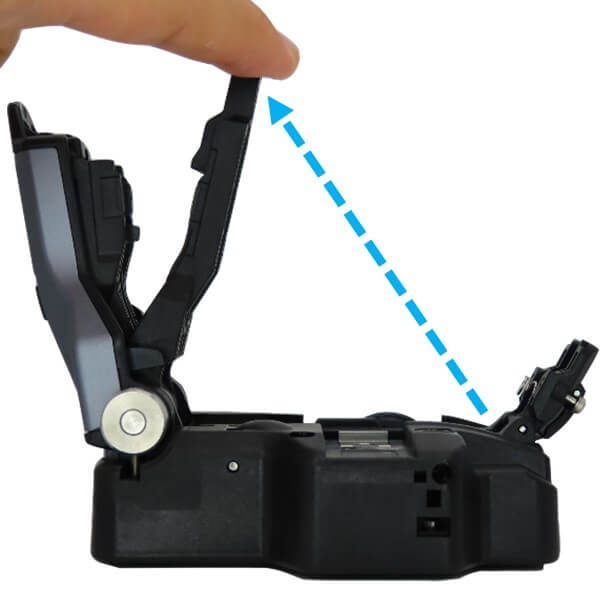
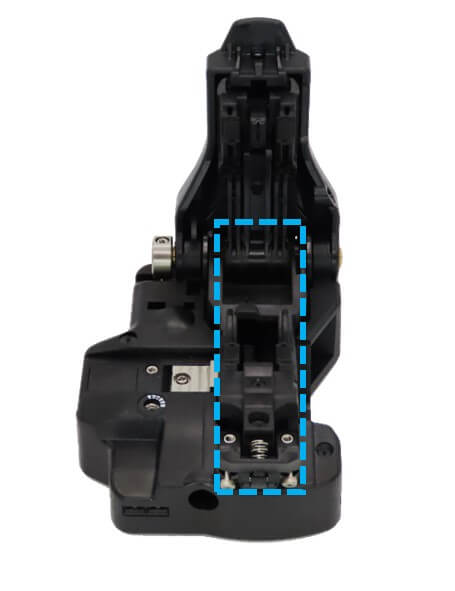
4. Lift the lower clamp arm.
*Be careful not to touch the cutting blade with your hand.
4. Lift the lower clamp arm.
Lever
lower clamp arm
Lever
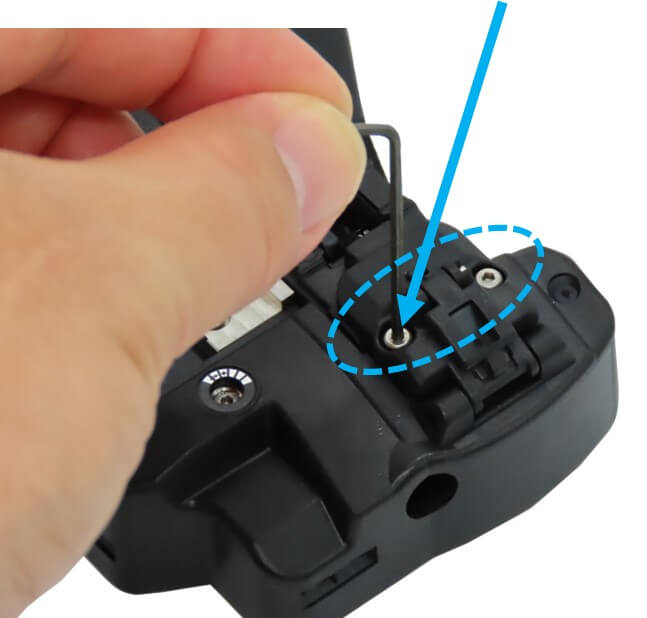
①Lift the lever until it stops
②Loosen the hex screws on the arm holder
③Lift the lower clamp arm
*Be careful not to touch the cutting blade with your hand.
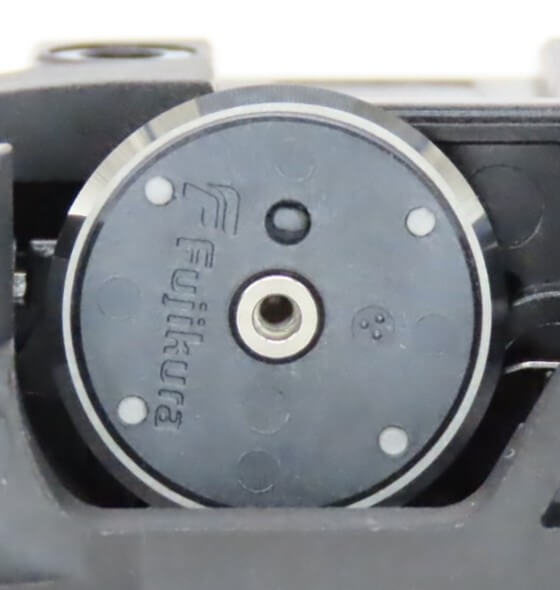
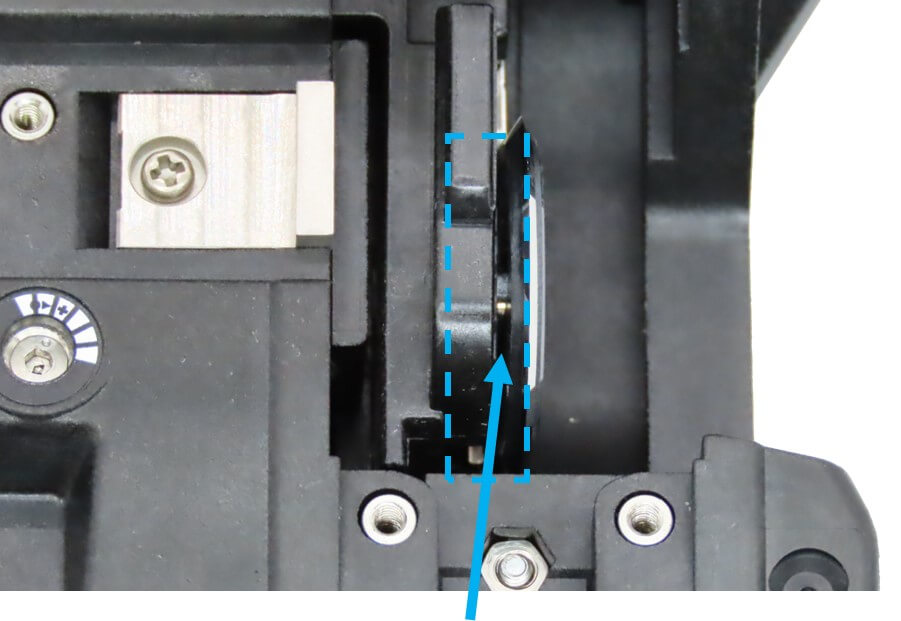
5. Remove the blade rotation wheel located next to the cutting blade.
*Be careful not to touch the cutting blade with your hand.
5. Remove the blade rotation wheel located next to the cutting blade.
Blade rotary wheel
①Loosen the hexagonal screw in the center of the Blade rotary wheel
②Remove the Blade rotary wheel
*Be careful not to touch the cutting blade with your hand.
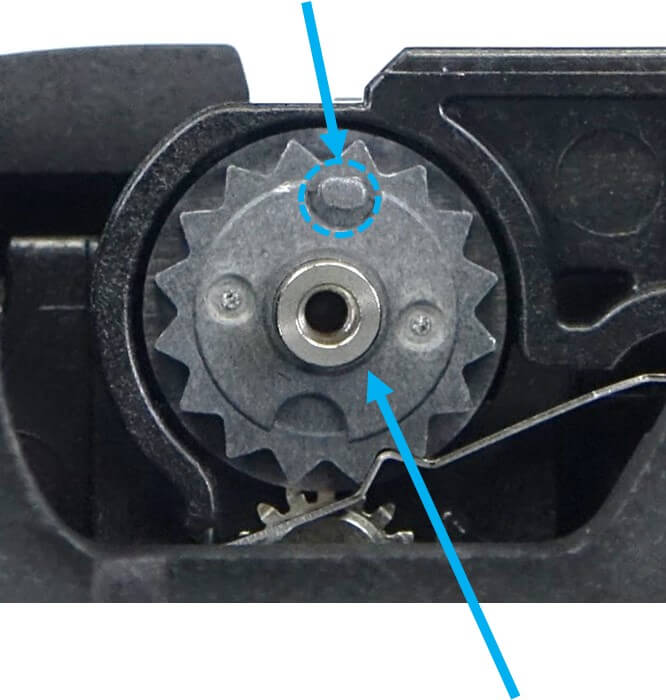
6. Use tweezers to remove the used cutting blade.
Used blade
*Be careful not to touch the cutting blade with your hand.
6. Use tweezers to remove the used cutting blade.
Used blade
*Be careful not to touch the cutting blade with your hand.
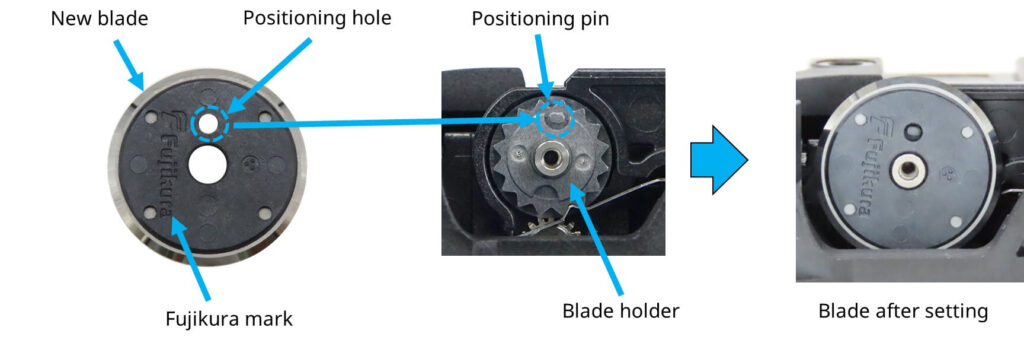
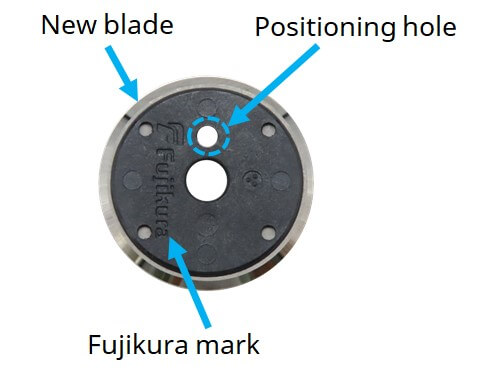
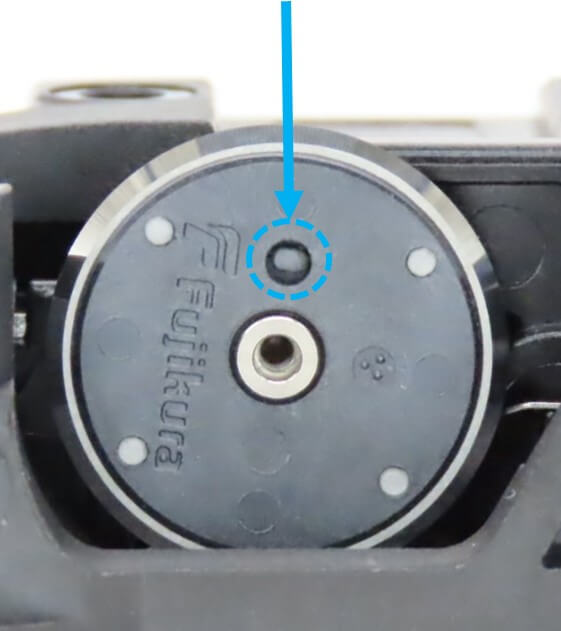
7. Set the new blade on the position pin of the blade holder.
*Be careful not to touch the cutting blade with your hand.
7. Set the new blade on the position pin of the blade holder.
Positioning pin
Blade holder
Blade after setting
*Be careful not to touch the cutting blade with your hand.
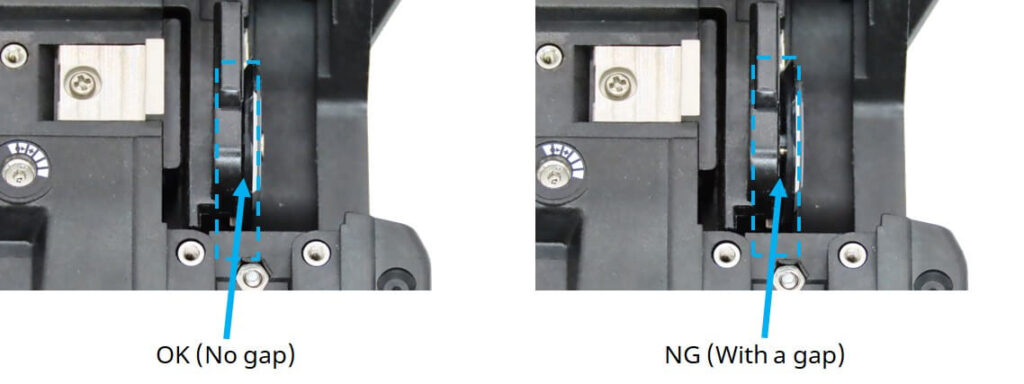
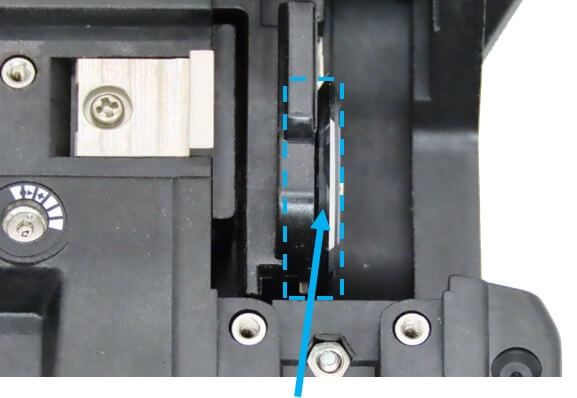
8. After setting the cleave blade, make sure that the cleave blade hits the blade holder and there is no gap.
8. After setting the cleave blade, make sure that the cleave blade hits the blade holder and there is no gap.
OK(No gap)
NG(with gap)
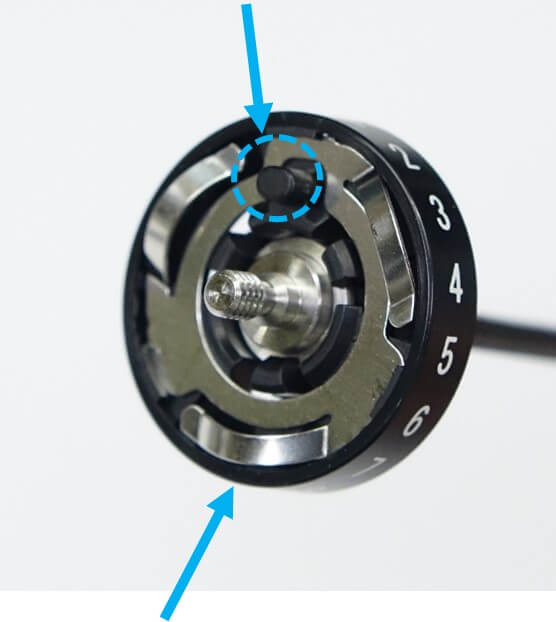
9. Attach the Blade rotary wheel to the blade.
*Be careful not to touch the cutting blade with your hand.
9. Attach the Blade rotary wheel to the blade.
Positioning pin
Blade rotary wheel
Upper positioning hole
Center of blade rotating wheel Tighten with hexagon screw
*Be careful not to touch the cutting blade with your hand.
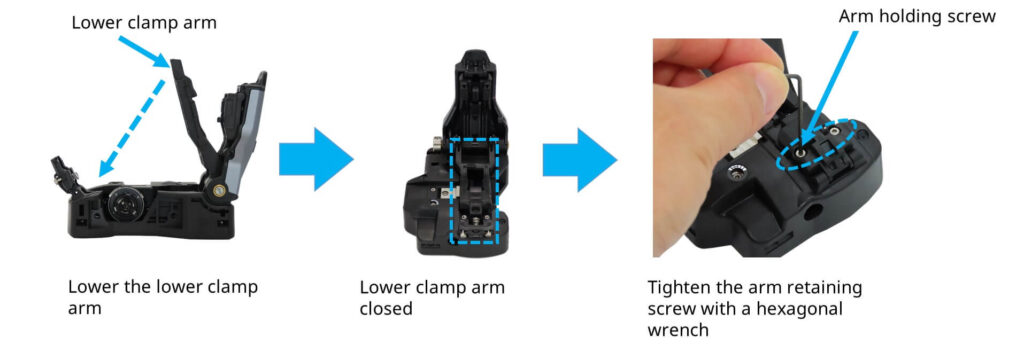
10. Lower the lower clamp arm down to fix it.
*Be careful not to touch the cutting blade with your hand.
10. Lower the lower clamp arm down to fix it.
Lower clamp arm
①Lower the lower clamp arm
②Lower clamp arm closed
Arm holding screw
③Tighten the arm retaining screw with a hexagonal wench
*Be careful not to touch the cutting blade with your hand.
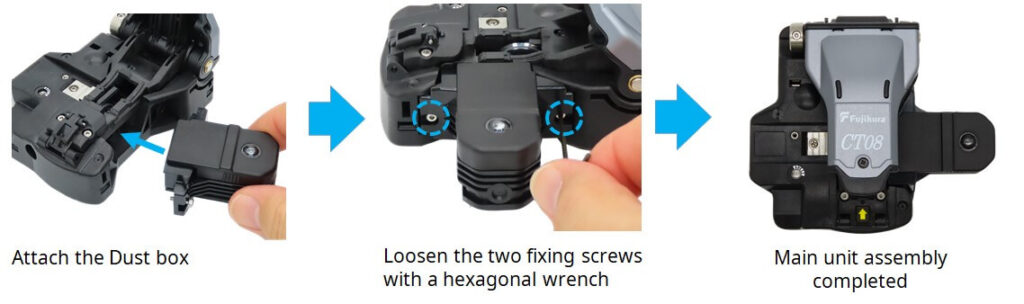
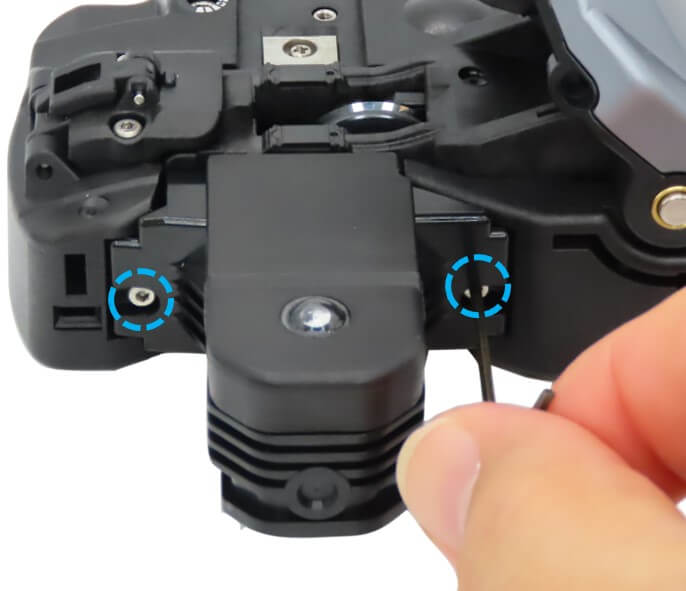
11. Attach the Fiber Scrap Collector. Then attach Dust box.
* It need to adjust the cleaver blade height. Refer to another video for the adjustment method.
11. Attach the Fiber Scrap Collector. Then attach Dust box.
①Attach the Dust box
②Loosen the two fixing screws with a hexagonal wrench
③Main unit assembly completed
* It need to adjust the cleaver blade height. Refer to another video for the adjustment method.